Latest news, events, and updates on all things App related, plus useful advice on App advisory - so you know you are ahead of the game.
Connect with us


Here’s how to Build an Advanced Xero/QuickBooks Data Query in Google Sheets
We are going to share some quick tips with you about how to build an advanced Xero/QuickBooks data query in Google Sheets. We have a very flexible and unique method of doing this based on your business needs. If you’re an expert in SQL, you can probably build very complex queries, but what about those of us that are not? No worries, because we’ve got the perfect solution for you! The query that we’ve built has already been parsed, optimized, and analyzed to ensure that it satisfies the syntactical and semantical requirements.
In this blog post, we’re going to show you how to build an advance query using our tool. Once you understand how it works, you’ll be able to easily apply it in any product from G-Accon for Xero/QuickBooks/HubSpot.
In our example, we will be logging in to our Xero organization through G-Accon for Xero. Our goal today is to build a query that will join three tables – Invoices, Payments, and their corresponding Accounts.
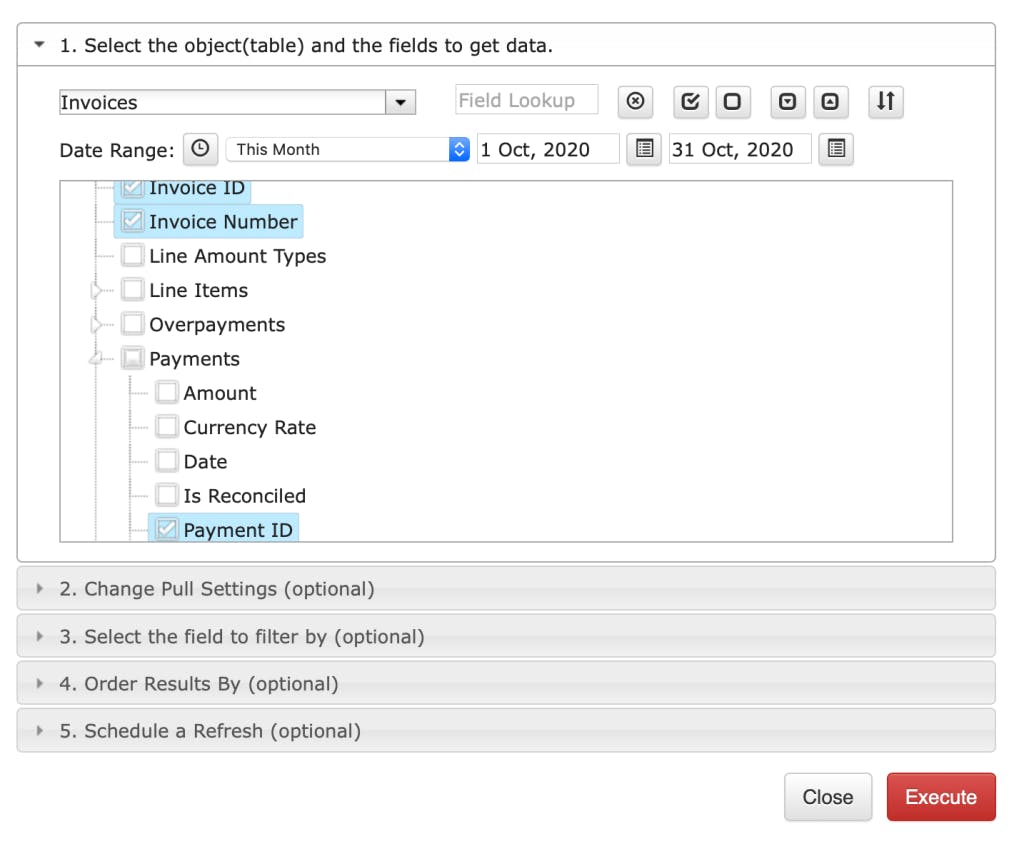
The first step is to select the desired Invoice’s attributes: Invoice Number, Description, Line Items, Payment ID, and so on. This Payment ID will be used when we join the second (Payments) table.
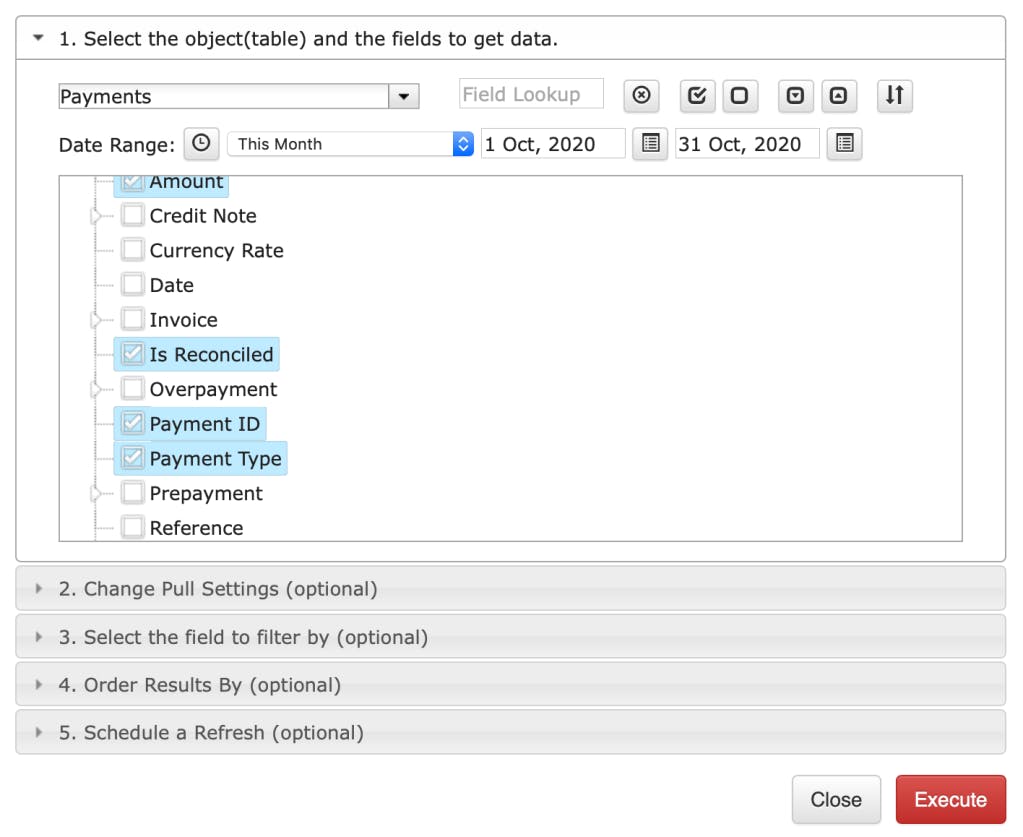
The next step is to select Add-ons -> G-Accon for Xero -> Get Accounting Data -> Payments. After selecting the Payments option from the drop down menu, you can click “all attributes” or “some attributes” based on your preferences. You can also expand attributes to see the whole structure with sub-attributes, as well as collapse it. The Account ID attribute needs to be selected, as well.
Next, select the “Filter By IDs” radio button, highlight the required Payment ID in the sheet, and use the “reference” icon to insert the data range.
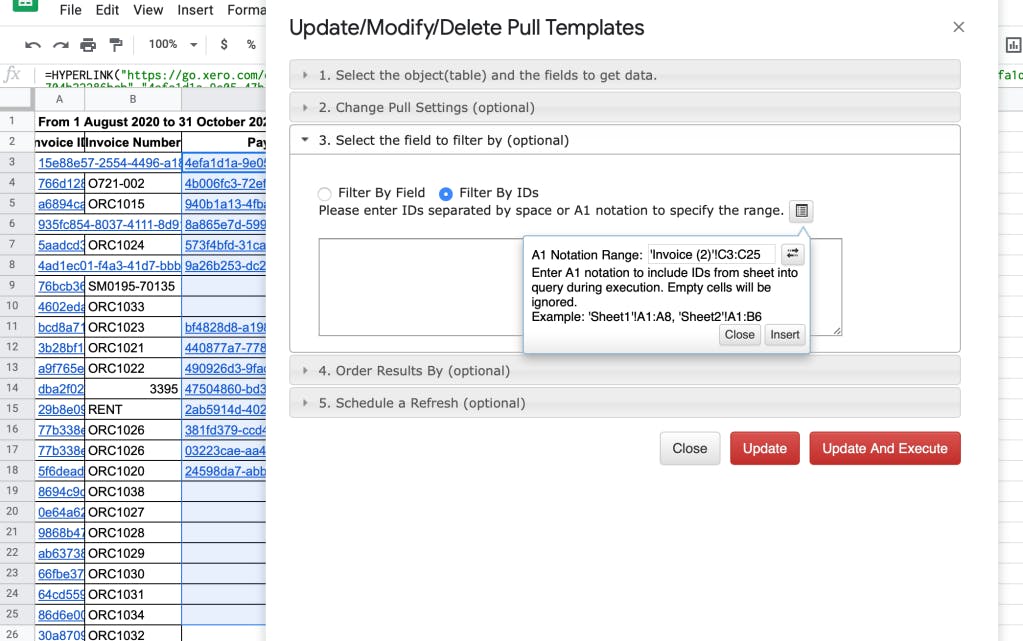
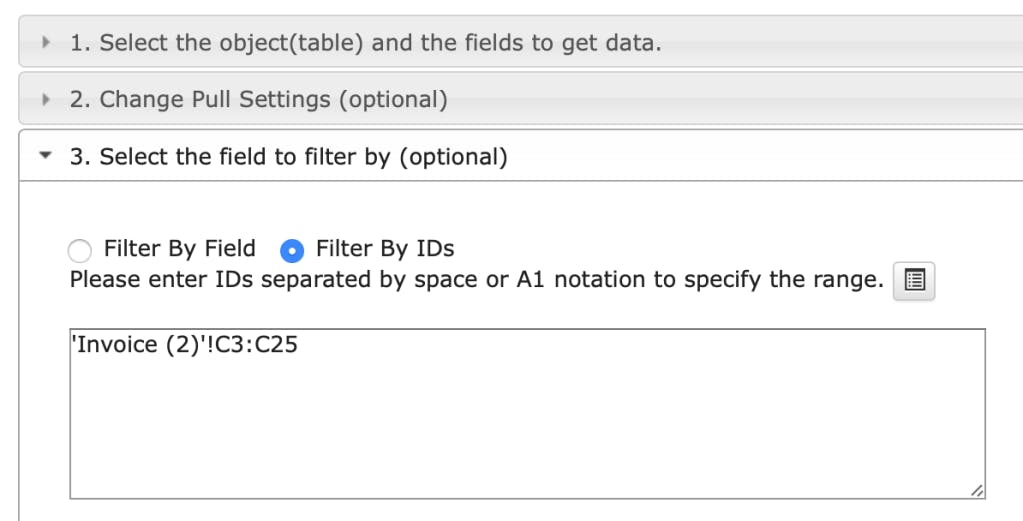
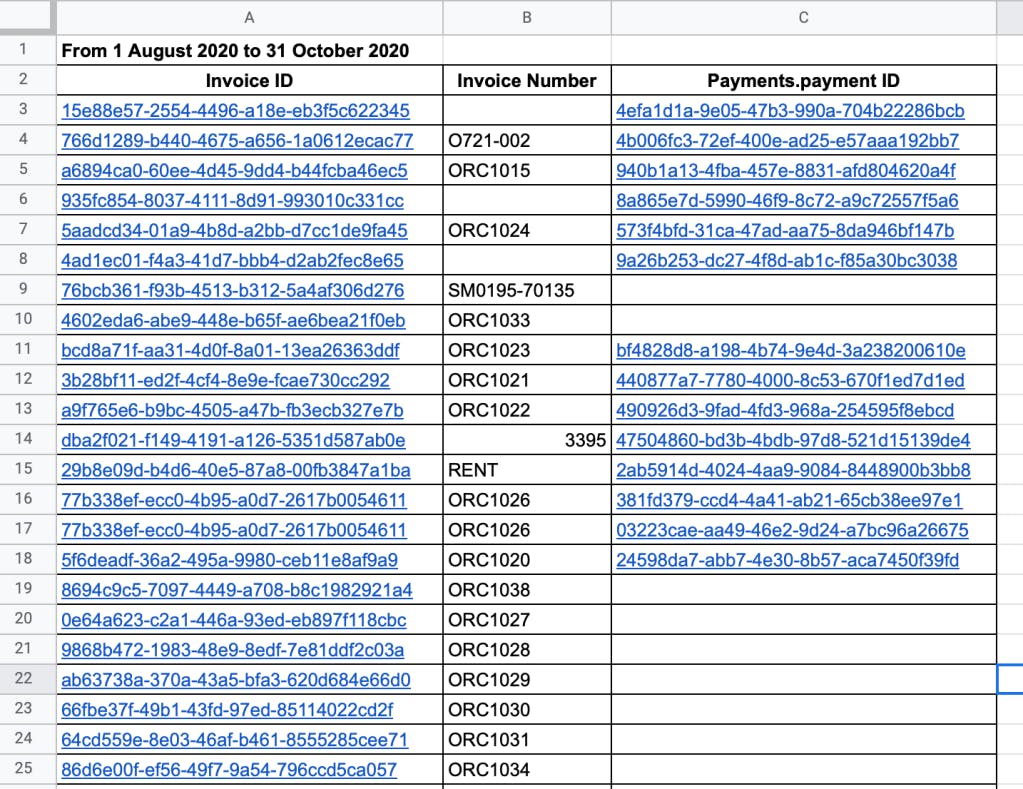
Selected Payment IDs – in data range: C3:C25
To display our data in the same table, we need to adjust the start cell. In our case, it is D1:

In this example, we joined two tables: Invoices and Payments and their corresponding details.
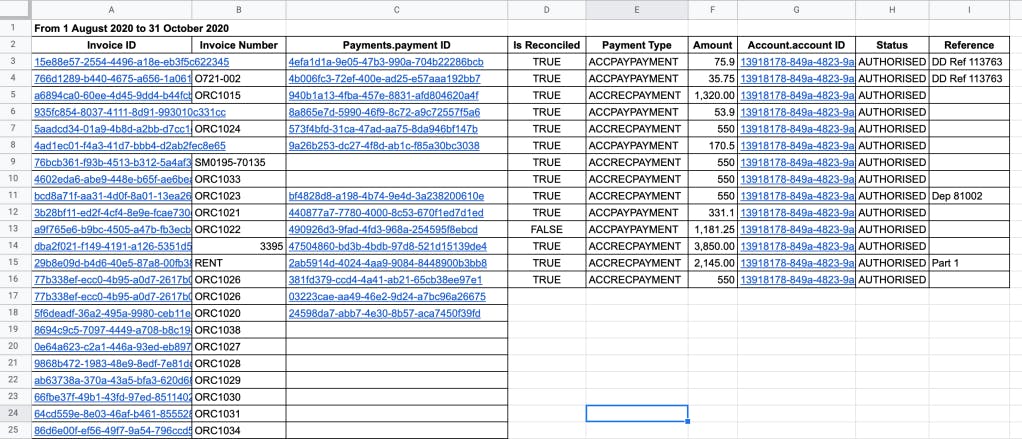
Invoices and Payments tables
Finally, we will join the 3rd table – Accounts. To do this, click Add-ons -> G-Accon for Xero -> Get Accounting Data -> Accounts. After selecting the Accounts option from the drop down menu, click the Filter By IDs radio button, highlight the required Account ID in the Google Sheet, and use the “reference” icon to insert the data range.

Then we can go ahead and execute the query.
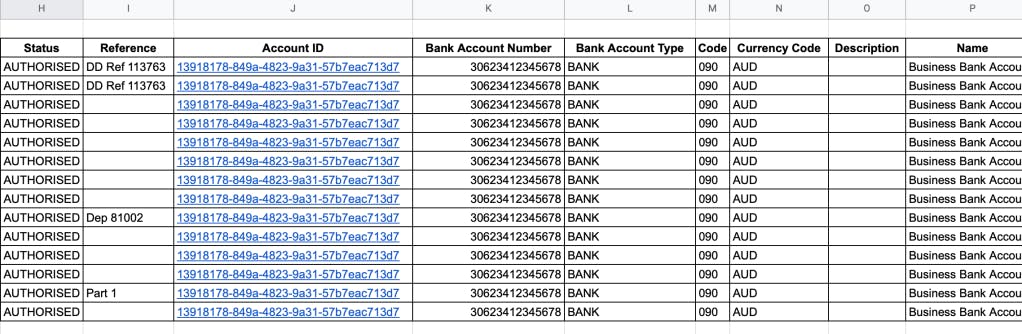
As you can see in our final results, we’ve combined the three tables with our desired attributes. This query can be manually or automatically refreshed by using our workflows.
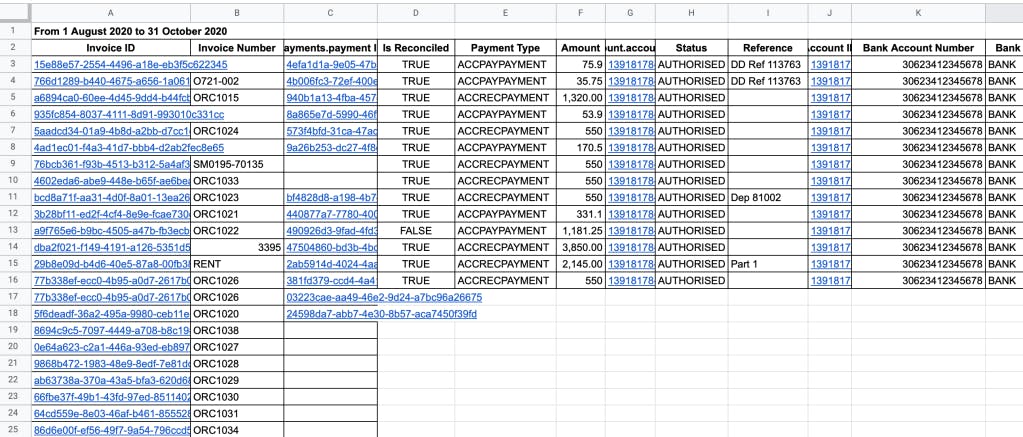
Invoices, Payment, and Accounts.
Latest news, events, and updates on all things App related, plus useful advice on App advisory - so you know you are ahead of the game.